
Demystifying Django’s Magic
Precious NdubuezeAccording to the official documentation,
Django is a high-level Python Web framework that encourages rapid development and clean, pragmatic design. Built by experienced developers, it takes care of much of the hassle of Web development, so you can focus on writing your app without needing to reinvent the wheel. It’s free and open source.
— DjangoProject.com
It is one of Python’s popular framework for building web applications and is most preferred for its scalability in creating a boilerplate with laid down configurations and files. This wraps up the whole goal of Django for developers;
“...building a great application in little time and less worry over basic settings.”
There are basic configurations, files and styling that cuts across all web application, no matter what you’re building. When using Django, these are generated for you automatically when you run certain commands at different points in the development cycle of your application. With this, you’ll have enough time to focus on the core aspect of your developing your application while Django handles the others for you.
It means that there are a lot of things happening underneath the hood. For someone who does not have a full grasp of the moving parts, this can be overwhelming. In this article we’re going to be learning about the following:
- Installation of Django
- The
startprojectandstartappcommands - Django configuration files which include;
- Models Layout
- Routing
We’ll learn how these all fit together and the role they play. It’s important to know that it will not be possible to take a look at everything happening inside of Django. For cases outside the scope of this tutorial, there will be links to point you to resources that will help with that.
For learning purpose, we will be building an e-commerce platform. This is not a full-blown e-commerce site, our application will have only two basic features; creating products and making orders from the admin’s view.
This article will guide you through understanding Django’s pre-built commands, files and basics. It is targeted at developers who have used Django or intend to use it and want to know what happens under the hood. While it is not compulsory that you must have used Django, having experience with the basics of Django before continuing with this article will give you an advantage. You need to have a working knowledge of Python to fully grasp what will be covered in this piece.
Installing Django
If you do not have Django installed already, here are the steps to do that.
First, create a virtual environment, named djangodev. You need this to isolate your Django workspace and its dependent packages.
python3 -m venv ~/.virtualenvs/djangodevNow to get into your virtual environment, you need to get it activated;
source ~/.virtualenvs/djangodev/bin/activateIf you get any error running with source you can make use of this alternative command,
. ~/.virtualenvs/djangodev/bin/activateFor Windows users, make use of this instead,
...\> %HOMEPATH%\.virtualenvs\djangodev\Scripts\activate.batNote: You need to activate the virtual environment anytime you want to use Django.
Now that you’re in your virtual env, install Django:
python -m pip install DjangoTo check if Django was properly installed, run;
python -m django --versionShakaboom! Now you’re set for some magic, get your wands ready!
The method of creating files and folders at the go might be simple and straightforward. However, it is not ideal when you have to create a medium or large project and a deadline to beat. We always have a deadline to beat, even for personal projects.
Following this method when creating a new large project, you’ll have to create multiple files and folders and make multiple settings, which could lead to the creation of avoidable bugs and a lot of wasted time. startproject and startapp commands available to us through Django aim to solve this problem. These two commands create files, folders and carry out lots of configuration for you.
Let’s get started by generating a new application using the startproject command.
Scaffolding An Application
We’ll generate our application and take a look at the files that are generated, as well as few commands we’ll use. Run this command in your terminal to get started;
django-admin startproject ecommerce_siteWhen installing Django, django-admin is added to your path to give it access to perform its actions. It’s Django’s command-line utility for administrative responsibilities. Learn more django-admin uses here; it is a little beyond the scope of this article.
startproject is a Django command that helps generate the project. Here we pass to it the name of our project ecommerce_site. It then goes on to create the project in a directory called ecommerce_site. The directory should look like this,

We’ll need to navigate into the newly created directory and run the command to generate the app.
cd ecommerce_site
python manage.py startapp trading
startapp is a command executed by manage.py in the project directory, it creates multiple files, and a folder named using the name specified in the command, in this case, what’s specified is trading. The app folder consists of simple files that should be needed for creating features of an application. Now your directory should be looking like this:

If you’re wondering the difference between a project and an app. A project is a Django web application, it can consist of one or more apps. It’s the folder holding manage.py and the other module that includes the settings.py and other files. An app is a python package that does a certain feature, includes files like models.py, the migration directory and more. You can check out this answer on Stack Overflow for more.
The startproject will create the main project directory, while the startapp will create the app directory. Both are also been passed a name to be used in generation. The startproject is the first command run when creating a new project, while the startapp is run inside the new project directory.
The current layout is a great mapping you can use for whatever application you are building. It’s scalable and consists of files you will be needing. There is a chance to create, rename, edit and move files within the project.
Django’s Configuration
Django provides different settings and configurations for you, after running the two commands in different files, let’s run through the generated files to learn what each does.
settings.py
Most web applications need configurations like; authentication to verify users, permissions to allow certain users with certain abilities and set security standards. All these are needed to give your users the best experience needed. It will take a long time for you as a developer to begin to roll each of these on your own, for every application you work on.
Django provides you with these needed configurations and more — such that you can opt for the ones you want and plug them in. These are done in settings.py, there are already laid settings created to provide basic functionalities for you.
When Django tries to run a project, there are certain variables it looks for. The settings.py is the file holding those variables that lead to other files or information. Django is directed to this file from the manage.py file and takes information or loads other files it is led to from here.
These configurations include:
DEBUG
TheDEBUGfunctionality is set toTrueto enable reading of errors and debugging code in development, it should be set toFalseduring production (i.e when you are deploying). This setting allows you to be able to debug your code better with the help of Django when it tries running your code.INSTALLED_APPS
This is a list of all apps performing a certain feature in Django. It comes with some defaults apps like the'django.contrib.auth'which is used for user authentication,django.contrib.admin'for admin functionality, and'django.contrib.messages'needed in sending notification or info to users. Any other app you create using thestartappcommand will have to be in here before it can be run by Django.MIDDLEWAREis a lightweight framework for processing inputs and outputs going through Django requests and responses. Each middleware does a specific function with an app, like the'django.contrib.auth.middleware.AuthenticationMiddleware'works with the'django.contrib.sessions'to associate users with requests. You should check out further features of each middleware on the docs.ROOT_URLCONFis a variable to a path where Django looks for yoururlpatternswhen a request is passed to your Django application. Whenever a request is made in a Django application, Django searches this variable and loads the leading file and loops though theurlpatternslist in search for the matching path.TEMPLATESis a setting to allow rendering of HTML files to represent a view. It communicates with the request, auth and messages apps. The'BACKEND'value and the'APP_DIRS'set toTrueenables Django to search for HTML files within /templates folder. The'context_processors'in theOPTIONSare callables, that take in the request as an argument and merge it with the context when a template is been rendered, these callables work to help with debugging, authentication, and handling of requests generally.WSGI_APPLICATIONis a path leading to theapplicationvariable inwsgi.pyfile.DATABASEis a dictionary that holds access to an external database(or internal like in the case of the default sqlite) like PostgresSQL, MySQL and MongoDB. Here is an example of a Postgres database I will be using for our example:
DATABASES = {
    'default': {
        'ENGINE': 'django.db.backends.postgresql_psycopg2',
        'NAME': 'db_name',
        'USER': 'db_user',
        'PASSWORD': 'db_password',
        'HOST': 'localhost',
        'PORT': '',
    }
}
You can decide to use the default sqlite database, this doesn’t work great for production. You can set up a Postgres database like above, you will have to create the database first and pass the user, password with write permission to the database.
Note: For the purpose of this tutorial you can use the default sqlite database set already. The above is a demonstration on how you can set SQL and NO-SQL database connection in Django.
AUTH_PASSWORD_VALIDATORSthese are functions that are called for password validations. They are called when creating users (and admins too) records, resetting and changing passwords. You can learn more about them from the official documentation.
More documentation on settings can be found here.
manage.py
Most web projects need an entry point where commands start from. An entry point acting as a gateway into the application. In every Django project, it is usually the manage.py file.
This file is needed as a starting point in your application. From here, all commands are run and everything starts up here.
manage.py does the same function as django-admin. It also tells Django the location for the configurations you have in your application. This is set by default and does not need to be changed.
It uses def main() function to handle the default settings module to our settings.py file. It tries to import the execute function, and if it runs into error it throws the ImportError. Otherwise, it takes in whatever argument is passed by the sys.argv from the command line and executes.
sys.argv is a list that takes in the command passed in via the terminal. When we run python manage.py runserver in the command line, sys.argv gets set to ["manage.py", "runserver"] and this is passed to the execute() function.
Arguments like python manage.py startapp trading or python manage.py makemigrations are set to [ "manage.py", "startapp", "trading"] and ["manage.py", "makemigrations"] respectively for execution.
The if statement is set to run if the command given set to manage.py.
Aside from running django-admin functions, you will be using it in running server, handle migrations, and other commands your project will be using. You will also need it when deploying, testing and debugging your projects.
Model Layout
Django provides a simple modelling layout for you. You configure your models in the models.py file in the trading directory. Your classes (or models) are layouts your database tables will follow.
You define your classes based on the data types you want to get from the user(or the admin) for each table. Our models create a migration file that works with the DATABASE variable in the settings.py.
Let’s create two models we’ll need, for products and orders:
from django.db import models

class Product(models.Model):
    name = models.CharField(max_length=50)
    image = models.ImageField(upload_to='products', default='python.png')
    price = models.IntegerField()
    description = models.TextField()

    def __str__(self):
        return self.name

class Order(models.Model):
    product =  models.ForeignKey(Product, on_delete=models.CASCADE)
    quantity = models.IntegerField()
    date = models.DateField(auto_now_add=True)
    user = models.CharField(max_length=50)

    def __str__(self):
        return self.user
The product model has a name, price, description and an image (which when saved will be uploaded to a products folder. This gets created if it folder doesn’t exist) columns. The order has a product (linked to the products table), the quantity, date and user columns.
With this information, Django creates a database schema for the app. Also, creates a Python database-access API for accessing Product and Order objects. Django has a built migration tool so you don’t have to use external packages for migrations.
Next step is to run the migration command and migrate to the database. But before we do that, we have to register trading as an app in our project directory.
First off, we have to configure the trading directory as an app in Django. Django has that done for you in the app.py file. This file registers trading as an app and will be further used in the settings.py file.
Now, in settings.py add trading in INSTALLED_APP. It should look like this:
INSTALLED_APPS = [
    'django.contrib.admin',
    'django.contrib.auth',
    'django.contrib.contenttypes',
    'django.contrib.sessions',
    'django.contrib.messages',
    'django.contrib.staticfiles',
    'trading.apps.TradingConf',
]
On the terminal, run:
$ python manage.py makemigrations trading
$ python manage.py migrate
Note: Your virtual environment must be activated and you should be inside the project directory.
python manage.py makemigrations trading takes note of changes made in the trading module and creates a file in the migration folder of changes in models.py and python manage.py migrate then updates the changes.
You can find the generated migration file from the python manage.py makemigrations trading command in the migration directory named 0001_initial.py. You can see the classes and columns as commands for creation inside the file. As more changes in models.py are made, more files will be generated here.
Admin Features
In our current application, we’ll need admin features to manage the products and orders that will be created in the application. Django provides us with an in-built admin functionality already at our disposal. The admin app(feature) has also been registered in our INSTALLED_APP list; 'django.contrib.admin'.
Also, the URL for the admin has also been registered in the urlpatterns list our URL configuration file urls.py; path('admin/', admin.site.urls),. The admin.py file makes it possible for you to register models and the CRUD actions that are to be performed on the models.
To set up the admin, run this on the terminal:
$ python manage.py createsuperuserYou’ll be prompted to enter a username, email and password. After that, you’ve successfully created an admin. To get started with the admin functionality, run the server:
$ python manage.py runserverVisiting http://127.0.0.1:8000/admin/ will lead to a login session, when you log in (with username and password you created) you are directed to admin dashboard:

The groups and users are default configurations that allow admin to access user management and permission. Now let’s register our models.
In the admin.py, add the following lines:
from django.contrib import admin

# Register your models here.
from .models import Product, Order

admin.site.register(Product)
admin.site.register(Order)
from django.contrib import admin imports the admin functionality from Django, and then we imported the two classes from our models.py and registered them so an admin can perform CRUD actions on products and order from the dashboard.
After registering the models, your dashboard should look like this:

Adding products:

Making orders from admin dashboard:

Easy Routing
Every site needs route or URLs leading to specific pages with certain information for the end-user. Collections of similar information or application are accessed in a particular route. There is a need for grouping routes together for accessibility and communication within files. Django has that done for you in the urls.py file.
The urls.py is a file leading from the ROOT_CONF variable in the settings.py. This is where our main URL configuration is done. When we create views in different files or folders, or even in the urls.py file, they have to be configured in the urlpatterns list.
Django expects a list named urlpatterns in the file. You can change the file in the ROOT_CONF variable to any other file which you placed the urlpatterns list.
urlpatterns = [
    path('admin/', admin.site.urls),
]
The list consists of objects that are instances of path or re-path. Each instance has two compulsory parameters, the pattern 'admin/', and a view or URL file, admin.site.urls.
The instances could also be leading to another file with more URL configurations. This is done for readability.
views.py
An important need for a backend application is the views which each route maps to. In Django, you write your function or class based views for an app in the views.py file. A view is a class or function that processes a request and sends back a response to your user.
Edit your views.py file to this:
from django.http import HttpResponse
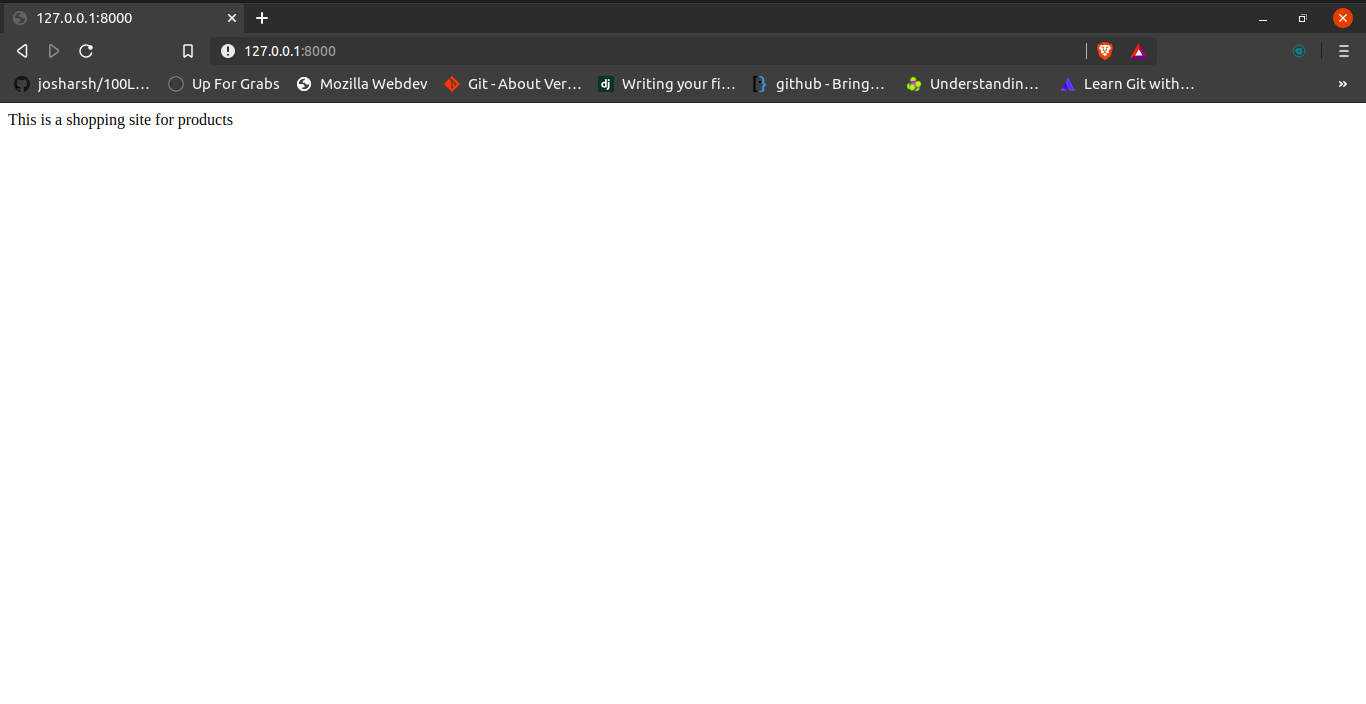
def home(request):
return HttpResponse("This is a shopping site for products")
def order(request):
return HttpResponse("Hello, welcome to our store, browse to our products and order!")Here we imported HTTPResponse to use it in defining two views (function views) to return sentence when called on. def home should be called when you visit the primary address and def order when you access the order URL.
After creating our views we need to assign it to different routes(or urlpatterns). That can be done in several ways, we can create a urlpatterns list in the same file, or we could import trading.views into ecommerce_site.urls file and create the path.
The preferred way to do so is creating a sub URL configuration file (inside trading), and including it in ecommerce_site.urls. Create a urls.py file in the trading directory. Your directory should look like:
trading/
    __init__.py
    admin.py
    apps.py
    migrations/
        __init__.py
        0001_initial.py
    models.py
    tests.py
    urls.py
    views.py
Add the following code to your new file (urls.py)
from django.urls import path

from . import views

urlpatterns = [
    path('', views.home, name='home'),
    path('order/', views.order, name='order'),
]
Let’s register the trading URL configuration file(urls.py) in the project URLs configuration file,
from django.contrib import admin
from django.urls import include, path

urlpatterns = [
    path('admin/', admin.site.urls),
    path('', include('trading.urls'))
]
To be able to access the urlpatterns we will use the include class from django.urls in line 2. Then chose a pattern and attached the urls.py file in the trading directory.
What we did here was to import the path class from django, and the views.py file. Then our list consists of two path instances for each view. So def home is called on http://127.0.0.1:8000/.
And def order is called on http://127.0.0.1:8000/order/.

Note: The process of running startproject and startapp is not compulsory but highly encouraged by Django. And you can create/move files and folders after running each command to your working convenience.
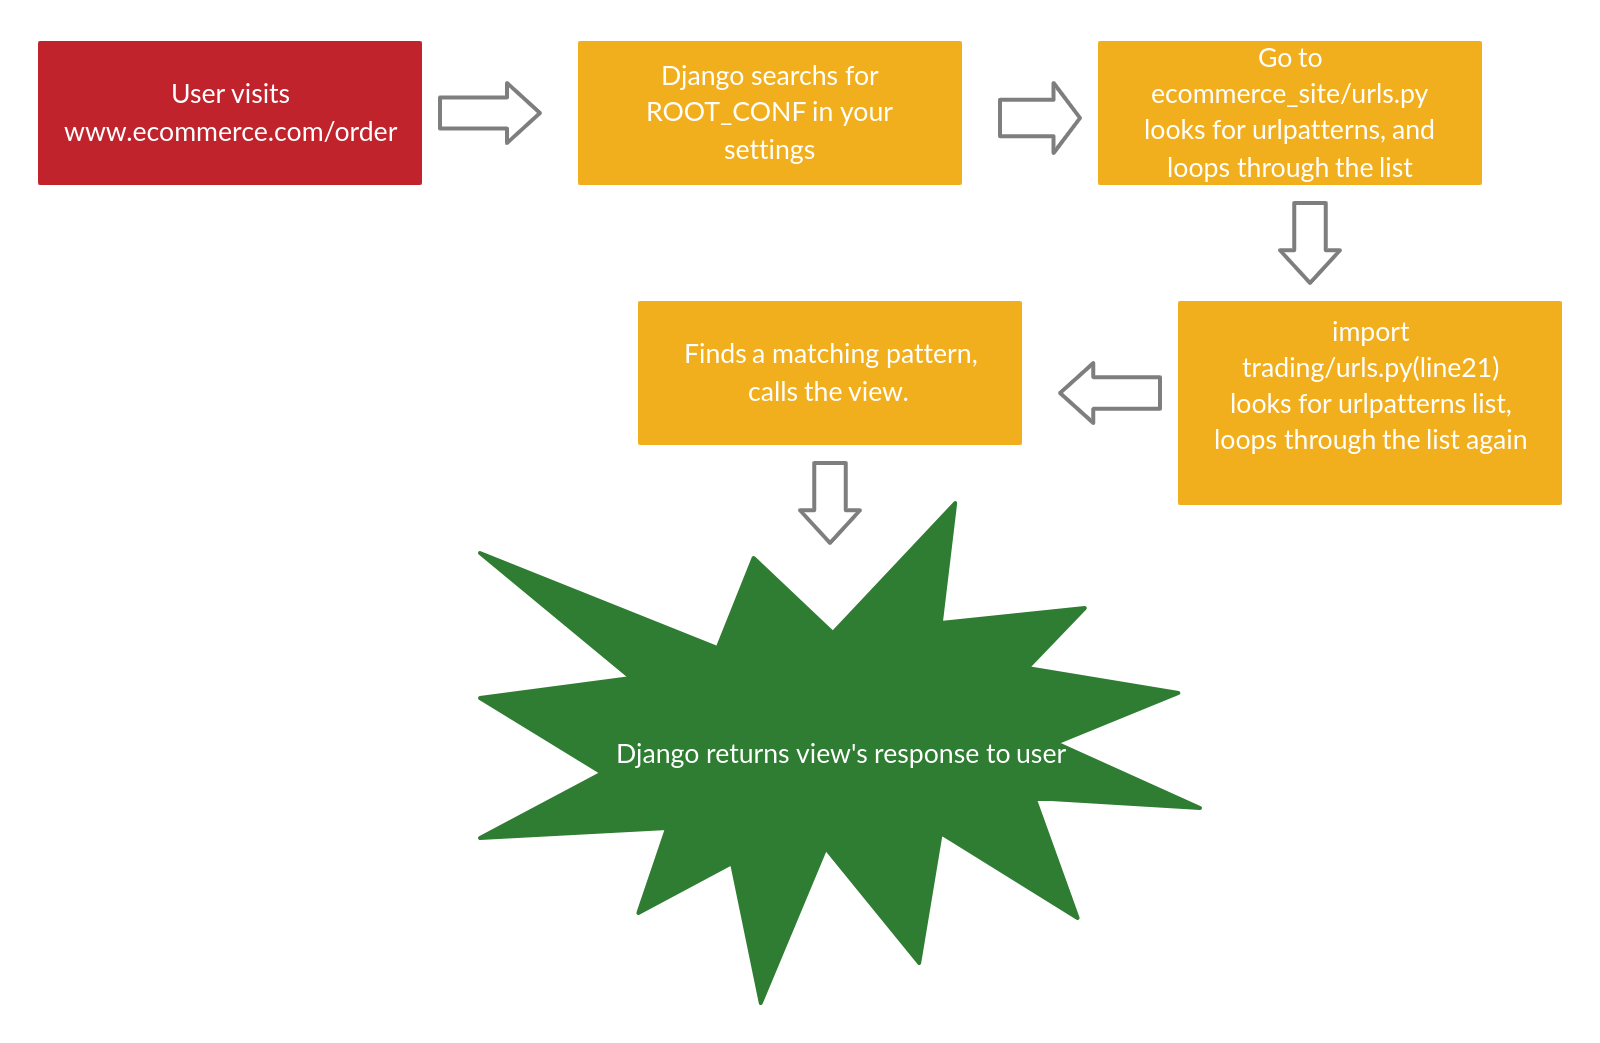
Dependency Tree
Here is the process in which Django processes requests from URLs coming:
- Django searches for the root location (path) for your URLs in the
ROOT_CONFvariable. - Django loads the python file given in the path provided. And locates the
urlpatternsvariable, this is a list containing all instances ofdjango.urls.path()and/ordjango.urls.re_path(). - In the list, Django goes in order and looks for a matching URL.
- Python, imports and calls the view (either function-based or class-based view). Which is furthered passed with the HTTP request.
- The view processes the request and information passed and either returns a message/template or redirects to another view.
- If no URL pattern matches, or if an exception is raised during any point in this process, Django invokes an appropriate error-handling view.
Conclusion
We have learnt of the possibility of creating files for Django without the command line. Also we have learnt the advantages and the building block of a Django Project. Django is an amazing tool in building backend projects with the goal to create simplicity.
You can check out the code for this tutorial on GitHub.
Resources
- Password management in Django
- Django: Getting started
- Django: Settings
- Lightweight Django by O’Reilly
from Articles on Smashing Magazine — For Web Designers And Developers https://ift.tt/2Ez1pvP
via IFTTT

0 Comments
Post a Comment